Introduction
Slime is one of those rare activities that sits perfectly at the intersection of science and play. It stretches, squishes, bounces, oozes, and drips in ways that feel almost alive—and every child who has ever held a handful of homemade slime has immediately wanted to know, “How does this work?” How did liquid glue turn into something so fascinatingly in between solid and liquid?
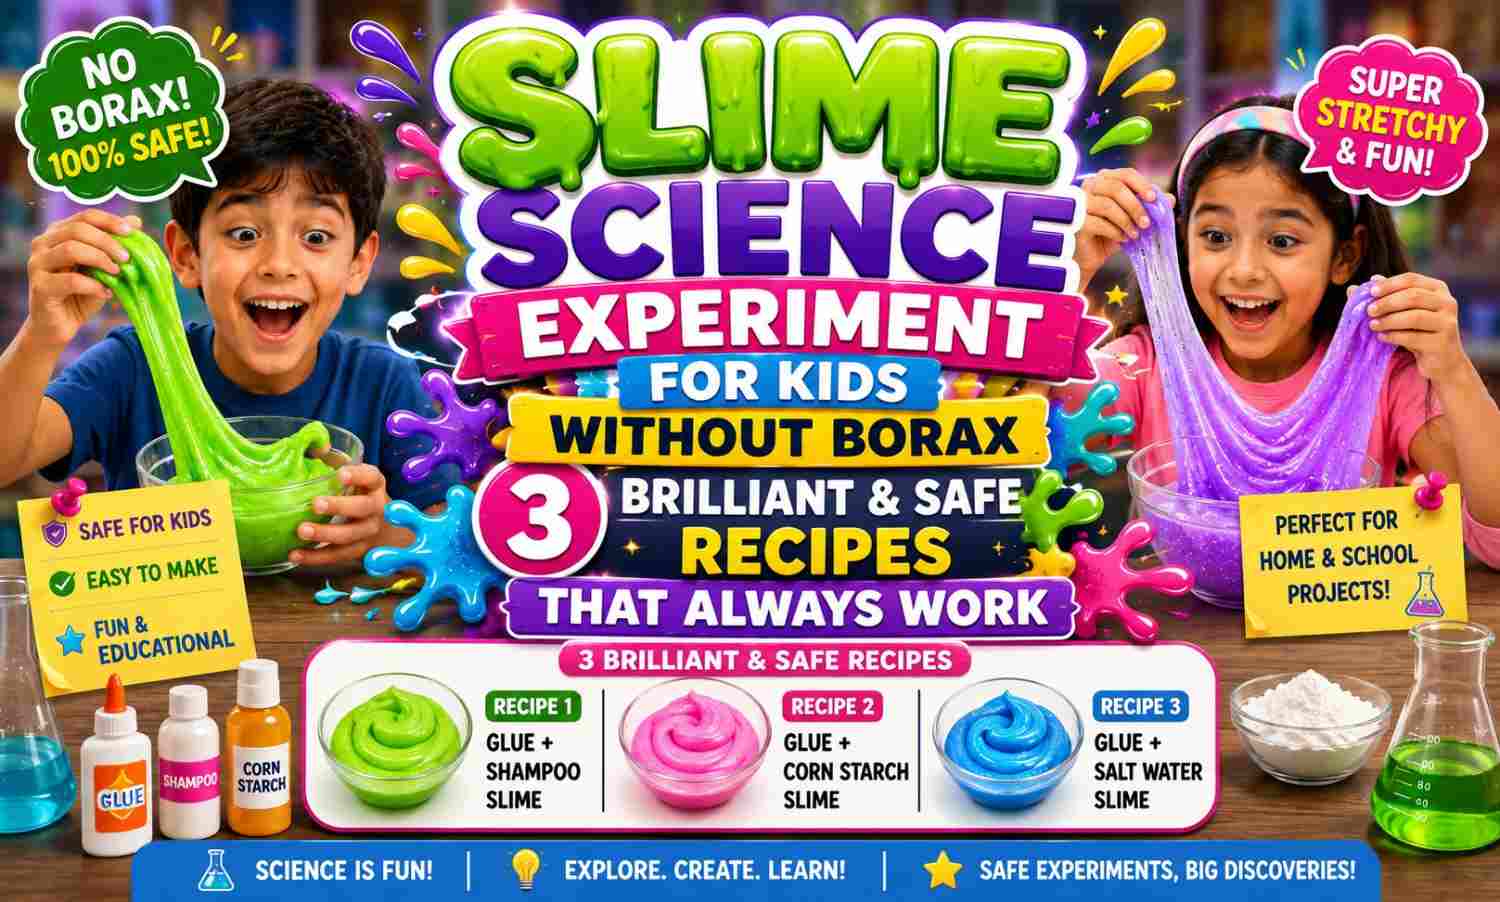
The slime science experiment for kids without borax answers that question beautifully—and does so using ingredients that are completely safe, widely available, and inexpensive. For years, the standard slime recipe relied on borax powder as an activator. While borax is not acutely dangerous in small amounts, it can cause skin irritation with prolonged contact, and many parents and teachers understandably prefer to avoid it—particularly with younger children.
The good news is that borax-free slime is not a compromise. The three recipes in this guide produce slime that is every bit as satisfying, stretchy, and scientifically interesting as any borax-based version—and each one teaches real polymer chemistry concepts that connect directly to cutting-edge materials science, biomedical engineering, and industrial manufacturing.
In this complete guide, you will find three thoroughly tested, always-successful slime science experiments for kids without borax — each with full step-by-step instructions, detailed science explanations, troubleshooting guides, and creative variations. You will also find a complete FAQ section, safety information, and ideas for turning any of these recipes into a proper school science fair project.
By the end, your child will not just have made the best slime of their life. They will understand — really understand — the remarkable chemistry happening between their fingers every time they stretch it.
The Science Behind the Slime Science Experiment for Kids Without Borax
Before diving into the recipes, it is worth understanding the chemistry that makes slime possible—because once you understand it, the recipes make perfect sense and troubleshooting becomes intuitive.
What Is Slime, Chemically Speaking?
Slime is a polymer network — a material made of long, chain-like molecules (polymers) connected to each other by chemical bridges called cross-links. The result is a material that behaves neither like a pure solid nor a pure liquid — it flows slowly under gentle force (like a liquid) but bounces and holds its shape under sudden impact (like a solid). Scientists call this type of material a non-Newtonian fluid or a viscoelastic material.
PVA Glue — The Polymer Starting Material
The base ingredient in most slime recipes is PVA glue (polyvinyl acetate) — standard white school glue or clear craft glue. PVA glue is already a polymer — it contains long chains of polyvinyl alcohol molecules suspended in water. In its liquid state, these chains slide freely past each other, which is why glue flows like a liquid.
Cross-Linking — The Magic Step
When an activator is added to PVA glue, it creates chemical bonds called cross-links that connect the polymer chains to each other at intervals along their length. Instead of sliding freely past each other, the chains are now linked together in a network—like a tangled net rather than a pile of loose strings.
This cross-linked network is what gives slime its unique properties. The chains can still move relative to each other (which is why slime flows), but the cross-links prevent them from separating completely (which is why slime stretches without breaking apart).
Borax-Free Activators
Traditional slime uses borax dissolved in water as the cross-linking activator. The three slime science experiments for kids without borax in this guide use different activators that achieve the same cross-linking chemistry through slightly different mechanisms:
Contact lens solution contains boric acid and sodium borate, which provide the same cross-linking chemistry as borax but in a much more dilute, gentler, safer form.
Liquid starch contains sodium tetraborate — again providing cross-linking without the concentrated borax powder.
Cornstarch and water create a completely different type of non-Newtonian fluid through physical rather than chemical means—demonstrating a fascinating alternative mechanism.
Understanding these three different mechanisms is what elevates the slime science experiment for kids without borax from a craft activity into genuine chemistry education.
Safety Information — Why Borax-Free Matters
The slime science experiment for kids without borax is specifically designed with child safety as the primary concern. Here is what parents and teachers need to know.
PVA Glue: Food-safe and non-toxic. Completely harmless on skin and safe if small amounts are ingested accidentally. Wash hands after making slime as a standard hygiene practice.
Contact Lens Solution: Safe for skin contact — it is specifically designed to contact the most sensitive tissue in the human body (the eye). Contains very low concentrations of boric acid compounds. Keep away from eyes in concentrated form.
Liquid starch: non-toxic and safe for skin contact. Some brands contain preservatives — check the label if a child has known sensitivities.
Cornstarch: Completely food-safe. No precautions needed.
Food Coloring: Can temporarily stain skin and permanently stain clothing. Use aprons and cover work surfaces. Gel food coloring stains more than liquid.
General Rule: All three slime science experiments for kids without borax are appropriate for children aged 4 and above with standard adult supervision. None of the ingredients require special handling, protective equipment, or safety precautions beyond normal kitchen hygiene.
Slime Science Experiment for Kids Without Borax — Recipe 1: Contact Lens Solution Slime
This is the most popular, most reliable, and most satisfying of all borax-free slime recipes. It produces a smooth, stretchy, satisfying slime that holds together beautifully and lasts for weeks when stored in an airtight container.
What You Need
- 1/2 cup (120ml) white PVA school glue OR clear PVA craft glue
- 1/4 teaspoon baking soda
- 1–2 tablespoons contact lens solution (must contain boric acid—check the label)
- Food coloring (optional)
- Glitter (optional)
- A mixing bowl
- A spoon or spatula
Step-by-Step Instructions
Step 1: Pour the PVA glue into the mixing bowl. If using white glue, your slime will be opaque and white-based. If using clear glue, your slime will be transparent and jewel-like — particularly beautiful with glitter.
Step 2: Add the baking soda and stir thoroughly until completely combined. The baking soda is not optional in this recipe — it reacts with the boric acid in the contact lens solution to create the right pH environment for cross-linking to occur. Without it, the contact lens solution alone will not activate the glue effectively.
Step 3: Add food coloring and glitter at this stage if desired. Stir thoroughly to distribute color evenly before adding the activator.
Step 4: Add contact lens solution one teaspoon at a time, stirring vigorously after each addition. You will notice the mixture beginning to pull away from the sides of the bowl and stick together as a mass.
Step 5: Keep adding contact lens solution and stirring. The mixture will become progressively less sticky and more cohesive. When it begins to hold together as a single mass that pulls cleanly away from your hands, stop adding solution.
Step 6: Remove the slime from the bowl and knead it vigorously with both hands for 2–3 minutes. It will feel sticky at first—keep kneading. As you work it, the slime will become smoother, stretchier, and less sticky with each passing minute.
Step 7: Test the slime. It should stretch slowly without breaking, hold its shape when left still, and feel smooth and non-sticky on clean hands. If it is too sticky, add a few more drops of contact lens solution and knead again.
Storage
Store in an airtight zip-lock bag or sealed container. Properly stored, this slime will last 2–4 weeks. If it begins to feel dry, add a few drops of water and knead. If it becomes too watery, add a drop of contact lens solution.
The Science
The baking soda raises the pH of the glue mixture, creating the alkaline environment needed for boric acid (from the contact lens solution) to form borate ions effectively. These borate ions are the actual cross-linking agents — they attach to the hydroxyl groups on the polyvinyl alcohol chains in the glue and create the bridges between chains that give slime its characteristic properties.
This is the same fundamental chemistry as borax slime—but the boric acid in contact lens solution is present at approximately 0.1–0.5% concentration compared to borax solutions used in traditional slime, which can be 3–4% in concentration. This makes the contact lens solution version dramatically safer while producing chemically identical results.
Slime Science Experiment for Kids Without Borax — Recipe 2: Cornstarch Oobleck
Oobleck is the most scientifically fascinating of all the slime science experiments for kids without borax options because it works through a completely different mechanism—not chemical cross-linking but physical particle jamming. The result is one of the most counterintuitive materials in science: something that flows like liquid when handled gently but becomes solid when force is applied.
What You Need
- 1 cup (150g) cornstarch (also called cornflour)
- 1/2 cup (120ml) water
- Food coloring (optional)
- A shallow bowl or tray (something wide — oobleck is best played with spread out)
Step-by-Step Instructions
Step 1: Pour the cornstarch into the bowl. Make a well in the center.
Step 2: If using food coloring, add it to the water first and stir to combine.
Step 3: Pour the colored water slowly into the cornstarch well. Do not stir vigorously—add the water gradually and mix gently with your fingers.
Step 4: The mixture will feel wrong — almost impossible to mix. Keep working gently. Too much force will make it solidify in your hands. Too little and it stays powdery. Work slowly and let gravity help.
Step 5: The correct consistency is achieved when the mixture flows slowly like thick cream when tilted but instantly resists and hardens when you try to poke or punch it quickly.
Step 6: Test it by scooping up a handful and squeezing firmly — it will feel completely solid. Open your hand and let it rest — it will melt and flow between your fingers like liquid.
Ratio Adjustment
The ratio of cornstarch to water is critical and may need slight adjustment based on your specific cornstarch brand and ambient humidity. If the oobleck is too watery, add cornstarch one tablespoon at a time. If it is too solid or crumbly, add water one teaspoon at a time.
The Science — Non-Newtonian Fluid Behavior
Oobleck is a non-Newtonian fluid—specifically a shear-thickening or dilatant fluid. Its viscosity (resistance to flow) increases when force is applied to it — the opposite of what most liquids do.
The explanation lies in the physics of particle suspension. Cornstarch consists of microscopic solid particles suspended in water. When the suspension is at rest or moving slowly, the particles have space to move past each other, and the mixture flows. But when force is applied suddenly, the particles are pushed together faster than the water between them can escape. The particles jam against each other, creating a momentary solid structure that resists the applied force.
This is physical rather than chemical — no cross-links are formed. The moment the force is removed, the particles unjam, and the mixture flows again. Scientists call this phenomenon shear thickening, and it has inspired research into body armor (fabrics soaked in shear-thickening fluid that harden on impact), speed bump alternatives, and joint protection systems in robotics.
Oobleck is named after the fictional substance in Dr. Seuss’s book “Bartholomew and the Oobleck”—a sticky green substance that falls from the sky and causes chaos. It is one of the most joyfully messy and scientifically rich of all slime science experiments for kids without borax.
Spectacular Oobleck Demonstrations
Walking on Oobleck: Scale up the recipe dramatically (approximately 2 kg cornstarch to 1 liter water) in a large plastic storage tub. The mixture will support a child’s weight if they step quickly, but they will sink if they stand still. This demonstration is unforgettable and makes the shear-thickening principle absolutely visceral.
Oobleck on a Speaker: Place oobleck in a shallow tray on top of a speaker or subwoofer. Play bass-heavy music. The vibrations will cause the oobleck to form extraordinary spikes, fingers, and standing waves—a phenomenon called the Faraday instability. This is one of the most visually spectacular science demonstrations available at any level.
Slime Science Experiment for Kids Without Borax — Recipe 3: Liquid Starch Slime
Liquid starch slime is the simplest of the three slime science experiments for kids without borax recipes in terms of steps—it requires no baking soda and fewer measurements. It also produces a uniquely textured slime — slightly firmer and less stretchy than contact lens solution slime, with a satisfying rubbery quality that many children prefer.
What You Need
- 1/2 cup (120ml) white PVA school glue
- 1/4 cup (60 ml) liquid starch (Sta-Flo or similar brand—found in the laundry aisle of most supermarkets)
- Food coloring (optional)
- Glitter (optional)
- A mixing bowl and spoon
Step-by-Step Instructions
Step 1: Pour PVA glue into the mixing bowl.
Step 2: Add food coloring and glitter if desired. Stir to combine evenly.
Step 3: Add liquid starch a little at a time—start with 2 tablespoons and stir thoroughly.
Step 4: The mixture will clump and appear lumpy at first. Keep stirring. It will gradually come together into a cohesive mass.
Step 5: Add more liquid starch one tablespoon at a time until the slime pulls away cleanly from the bowl sides and is no longer wet or sticky.
Step 6: Remove from the bowl and knead for 1–2 minutes until smooth.
Step 7: Test by stretching slowly — it should stretch several centimeters before breaking. If it tears immediately, it needs more kneading. If it is too sticky, add a small amount of additional liquid starch.
The Science
Liquid starch contains sodium tetraborate, a compound closely related to borax but present in a much more dilute form. The sodium tetraborate provides borate ions that cross-link the polyvinyl alcohol chains in the PVA glue—the same fundamental chemistry as Recipe 1 but with a different borate source.
The slightly different borate concentration in liquid starch compared to contact lens solution produces a slime with subtly different physical properties—typically firmer, with less elasticity but more structural integrity. This difference in properties from the same basic chemistry makes an excellent topic for scientific comparison and investigation.
6 Creative Variations to Extend the Slime Science Experiment for Kids Without Borax
Once the basic recipes are mastered, these variations add new dimensions of learning and creativity to the slime science experiment for kids without borax.
Variation 1: Magnetic Slime
Add iron filings (carefully — iron filings can be sharp) or iron powder to the contact lens solution slime recipe before cross-linking. The resulting slime will be attracted to magnets—it will creep toward a strong magnet held nearby and dramatically engulf it when placed directly on the slime’s surface. This demonstrates ferromagnetism in a completely novel material.
Variation 2: Glow in the Dark Slime
Replace food coloring with glow-in-the-dark paint in any of the three recipes. Charge the finished slime under a bright light for 30–60 seconds and take it into a dark room. The slime will glow with an eerie green light, producing absolute delight. This combines polymer chemistry with the photoluminescence of phosphorescent pigments.
Variation 3: Galaxy Slime
Make three separate small batches of contact lens solution slime using clear glue — one colored deep purple, one dark blue, and one black with silver glitter. Without fully mixing them, combine all three batches into a single mass and fold them together loosely. The result is a galaxy-patterned slime that looks extraordinary and demonstrates how incompletely mixed polymer networks maintain their color boundaries.
Variation 4: Fluffy Slime
Add 3 cups of white shaving foam to the glue before adding the activator in Recipe 1. The shaving foam introduces millions of tiny air bubbles into the polymer network, creating a dramatically lighter, puffier, cloud-like slime texture. This is fluffy slime — one of the most popular slime variants — and it demonstrates how entrapped air can fundamentally alter the physical properties of a polymer network.
Variation 5: Edible Slime
Mix 1/2 cup of cornstarch with 1/4 cup of water and 2 tablespoons of sugar and a few drops of food coloring. Microwave for 30-second intervals, stirring between each, until the mixture thickens into a gel. Allow it to cool. The result is a completely edible slime — safe for very young children — that demonstrates gelling through starch gelatinization rather than cross-linking.
Variation 6: Scientific Comparison Project
Make all three borax-free slime recipes and test them systematically across the same set of measurements. How far does each stretch before breaking? How quickly does each flow off a tilted surface? How long does each maintain its properties before drying out? Present results in a table and bar chart. This turns the slime science experiment for kids without borax into a complete multi-variable scientific investigation — ideal for science fairs and homeschool science units.
Troubleshooting Guide — Slime Science Experiment for Kids Without Borax
Contact Lens Solution Slime Problems
Problem: Slime is too sticky and will not come together. Solution: You need more activator. Add contact lens solution half a teaspoon at a time, kneading between additions. Make sure your contact lens solution contains boric acid — some brands do not and will not work for slime.
Problem: Slime is too stiff and breaks when stretched. Solution: You have added too much activator. Add a few drops of warm water and knead thoroughly. The water slightly dilutes the cross-linking and softens the slime.
Problem: Slime feels grainy or lumpy. Solution: The baking soda was not fully dissolved before adding the activator. Make sure to stir the baking soda into the glue thoroughly before adding any contact lens solution.
Problem: Contact lens solution does not activate the slime at all. Solution: Check the ingredients label of your contact lens solution. It must contain boric acid or sodium borate as an active ingredient. Many daily disposable and sensitive eye formulas do not contain these compounds and will not cross-link PVA glue.
Oobleck Problems
Problem: Oobleck is too watery and always flows. Solution: Add cornstarch one tablespoon at a time until the mixture resists sudden pokes. The ratio depends on your specific cornstarch brand.
Problem: Oobleck is crumbly and powdery. Solution: Add water one teaspoon at a time, mixing gently. Do not pour water too quickly.
Problem: Oobleck dries out quickly. Solution: Oobleck does dry out — this is normal. Simply add water and re-mix. Store covered with plastic wrap to slow evaporation.
Liquid Starch Slime Problems
Problem: Slime is very wet and stringy. Solution: Add more liquid starch and continue kneading. Some liquid starch brands are more dilute than others and require larger quantities.
Problem: Cannot find liquid starch. Solution: Substitute with a mixture of 1/2 teaspoon of cornstarch dissolved in 1/4 cup of warm water and 1/4 teaspoon of boric acid (available at pharmacies). This approximates liquid starch chemistry at home.
Turning Slime Into a Science Fair Project
The slime science experiment for kids without borax has exceptional potential as a science fair project—particularly because it involves measurable, comparable variables and genuine chemistry concepts.
Excellent Research Questions:
- Which borax-free activator produces the stretchiest slime?
- How does the ratio of activator to glue affect slime stiffness?
- Does temperature affect how quickly slime cross-links?
- How long do different borax-free slimes last before degrading?
- Does the type of glue (white vs. clear PVA) affect slime properties?
Measuring Slime Properties: Use a ruler to measure stretch distance before breaking. Time how long it takes for a ball of slime to flatten on a flat surface (a measure of flow rate). Use a kitchen scale to measure consistent amounts for fair comparisons.
Presenting Results: A data table comparing all three recipes across three or four measurable properties, accompanied by bar charts and a written conclusion explaining the chemistry behind the differences, makes an outstanding and genuinely impressive science fair presentation.
For additional polymer chemistry background, the American Chemical Society’s Chemistry for Kids resources provide excellent, curriculum-aligned reading material for both children and teachers.
Frequently Asked Questions (FAQ)
Q1: Why does my slime not work with contact lens solution? The most common reason is that your contact lens solution does not contain boric acid or sodium borate. Check the active ingredients list on the bottle. Brands like Bausch + Lomb ReNu, Opti-Free, and Clear Care contain boric acid and work well. Sensitive or preservative-free formulas often do not and will not activate slime.
Q2: Is the slime science experiment for kids without borax completely safe? Yes — all three recipes use non-toxic, widely available ingredients. The contact lens solution version contains very low concentrations of boric acid compounds — far lower than borax-based recipes. Standard hygiene practices apply: wash hands after playing, avoid contact with eyes, and keep away from very young children who might ingest it.
Q3: How long does borax-free slime last? Contact lens solution slime stored in an airtight container typically lasts 2–4 weeks. Liquid starch slime lasts 1–2 weeks. Oobleck dries out within hours unless stored covered but can be revived with water indefinitely. All slimes should be discarded if they develop an unusual smell or visible mold.
Q4: Can I fix slime that has become too stiff? Yes — add a few drops of warm water and knead thoroughly. The water slightly dilutes the cross-linking density, softening the slime. Add water gradually — a few drops at a time — to avoid making it too wet.
Q5: Why is clear glue slime better than white glue slime? Clear PVA glue produces transparent or translucent slime that looks spectacular with glitter or neon colors—particularly effective for galaxy, mermaid, or jewel-themed slimes. White PVA glue produces opaque slime that is better for pastel colors and fluffy slime variations. The chemical properties are identical — the choice is purely aesthetic.
Conclusion
The slime science experiment for kids without borax is far more than a satisfying sensory activity — though it is certainly that. It is a hands-on introduction to polymer chemistry, non-Newtonian fluid behavior, cross-linking reactions, and materials science—concepts that sit at the cutting edge of modern engineering, medicine, and technology.
Every time a child stretches a piece of contact lens solution slime and watches it thin to a translucent thread before snapping, they are observing polymer chain behavior that materials scientists study in university laboratories. Every time they punch a bowl of oobleck and feel it go solid beneath their fist, they are experiencing the same shear-thickening physics being developed for next-generation body armor and protective equipment.
The three recipes in this guide — contact lens solution slime, cornstarch oobleck, and liquid starch slime — each illuminate a different aspect of this rich science. Together, they provide a complete and genuinely deep introduction to how materials can be engineered at the molecular level to produce specific, useful properties.
And they are enormously, gloriously, mess-inducingly fun.
So lay out the newspaper, pour the glue, and start mixing. The polymer network is waiting to be built — and the science has never felt quite so good between your fingers.
External Resource (DoFollow): For more polymer chemistry education resources, experiment guides, and curriculum-aligned science activities, visit the American Chemical Society’s K–8 Chemistry Resources—a free, authoritative platform for chemistry education.