Introduction
Water is the most abundant, most studied, and most scientifically fascinating substance on the planet. It behaves in ways that seem simple on the surface but reveal extraordinary complexity the closer you look. It climbs upward against gravity. It holds objects that should sink. It changes density with temperature. It bends toward charged objects. It carries color between containers overnight.
Science experiments for kids using water are among the most accessible, most varied, and most genuinely educational activities available to parents, teachers, and curious children everywhere. Water requires no special handling, costs nothing, and is available in unlimited quantities from any tap in the house. Yet it demonstrates more scientific principles — surface tension, density, capillary action, pressure, buoyancy, the water cycle, and molecular polarity — than almost any other single substance on Earth.
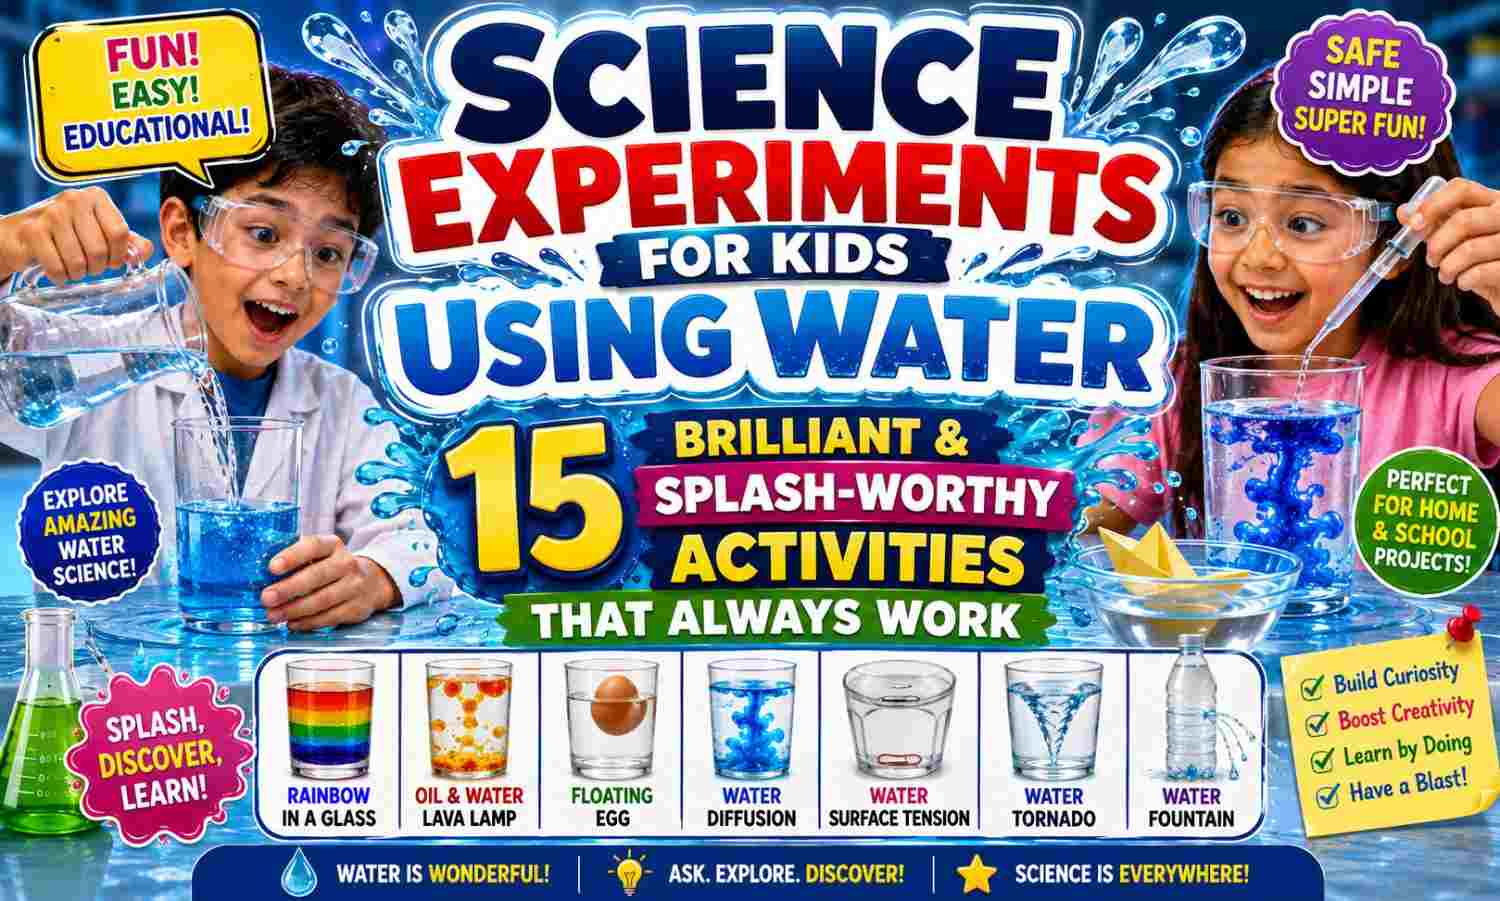
In this complete guide, you will find 15 brilliant, thoroughly explained, always-successful science experiments for kids using water — carefully selected to cover a wide range of scientific concepts and perfectly matched to children aged 5 to 12. Each experiment includes full step-by-step instructions, the science explained in child-friendly terms, age recommendations, and ideas to extend the learning further.
No special equipment needed. No expensive kits. Just water, a few common household items, and a child who is ready to discover that the most ordinary substance in their world is actually one of the most extraordinary things in the universe.
Why Water Is the Perfect Medium for Kids’ Science Experiments
Before diving into the 15 experiments, it is worth understanding why water is such an exceptional teaching tool for young scientists.
Water is a polar molecule—meaning it has a slightly positive charge on one side and a slightly negative charge on the other. This polarity is responsible for an astonishing range of behaviors: it creates surface tension, enables capillary action, makes water an excellent solvent, causes it to expand when it freezes (unusual among liquids), and allows it to interact dramatically with charged objects and soap molecules.
Water also has unusually high surface tension compared to most liquids—strong enough to support a paper clip or a water strider insect and responsible for the dome of water that forms on a penny before it overflows.
Its density changes significantly with temperature and dissolved substances — which is why salt water is denser than fresh water, why warm water rises above cold water, and why the density tower experiment produces such clear, stable layers.
Every single one of the 15 science experiments for kids using water in this guide exploits one or more of these remarkable properties—turning abstract scientific concepts into visible, touchable, memorable discoveries.
Science Experiments for Kids Using Water — 15 Brilliant Activities
Experiment 1: Walking Water — Capillary Action in Color
Concept Taught: Capillary action, absorption, color mixing
Age Range: 5–10
What You Need:
- 7 clear glasses or cups arranged in a row
- Water
- Red, yellow, and blue food coloring
- Paper towels (6 strips folded lengthways into narrow strips)
Steps:
- Fill glasses 1, 3, 5, and 7 with water. Leave glasses 2, 4, and 6 empty.
- Color glass 1 red, glass 3 yellow, glass 5 blue, and glass 7 red again.
- Fold paper towel strips lengthways and arch one strip between each pair of adjacent glasses so one end dips into each glass.
- Leave overnight and check in the morning.
- The empty glasses will have been filled with water—and the colors will have mixed to create orange, green, and purple!
The Science: Water molecules cling to the fibers of paper towels and pull other water molecules along with them—a process called “capillary action.” The same force draws water up through plant stems from roots to leaves. The colors mix in the empty glasses as water from two differently colored glasses travels toward the same destination—demonstrating both capillary action and color mixing through the additive process.
Take It Further: Try different materials—cotton strips, wool, and string—and compare which carries water fastest.
Experiment 2: Penny Water Drops — Exploring Surface Tension
Concept Taught: Surface tension, cohesion, molecular attraction
Age Range: 5–12
What You Need:
- Several clean pennies or coins
- An eyedropper or pipette
- A glass of water
- A glass of soapy water
- A notebook for recording results
Steps:
- Place a penny flat on a stable surface.
- Use the eyedropper to add water drops one at a time to the penny surface.
- Count carefully — how many drops can you add before the water overflows?
- Record your result. Repeat 3 times and find the average.
- Repeat the entire experiment using soapy water instead of plain water. Compare!
The Science: Water molecules are strongly attracted to each other—a property called cohesion. At the surface, water molecules pull toward each other, creating a flexible skin called “surface tension.” This surface tension allows the water to dome up significantly above the penny’s edge before finally breaking and overflowing. Soapy water has much lower surface tension because soap molecules disrupt the bonds between water molecules—so soapy water overflows much sooner. The average penny holds 20–30 drops of plain water — far more than most children predict.
Experiment 3: Density Tower — Layers of Liquid
Concept Taught: Density, buoyancy, fluid properties
Age Range: 7–12
What You Need:
- A tall, clear glass or cylinder
- Honey
- Colored dish soap
- Colored water (add food dye)
- Vegetable oil
- Rubbing alcohol (colored with food dye in a different color)
- A spoon
Steps:
- Pour honey into the glass first — it is the densest liquid and forms the bottom layer.
- Carefully pour dish soap over the back of a spoon so it settles gently on top of the honey.
- Add colored water next, pouring slowly over the spoon.
- Add vegetable oil next — it will float above the water layer.
- Finally, pour colored alcohol very slowly over the spoon—it will float above the oil.
- The result is five distinct, colorful, stable layers!
The Science: Each liquid has a different density — the amount of mass packed into a given volume, measured in grams per milliliter. Honey (~1.4 g/ml) is densest and sinks to the bottom. Alcohol (~0.79 g/ml) is least dense and floats at the top. Each liquid settles at its own density level, creating a stable tower that will remain separated for hours. This is one of the most visually spectacular science experiments for kids using water because it makes the invisible concept of density completely tangible.
Take It Further: Drop small objects of different densities into the tower—a grape, a coin, a cork, and a piece of wax—and predict where each will settle.
Experiment 4: Rain in a Jar — The Water Cycle Model
Concept Taught: Evaporation, condensation, the water cycle
Age Range: 5–10
What You Need:
- A large glass jar
- Very hot water (adult assistance for young children)
- A plate or shallow bowl filled with ice
- Blue food coloring (optional)
Steps:
- Pour about 5 cm of very hot water into the jar. Add a drop of blue food coloring if desired.
- Immediately place the plate of ice on top of the jar opening.
- Watch the inside of the jar carefully.
- Within a minute, water vapor will condense on the cold underside of the plate and begin dripping back down — rain!
The Science: Hot water evaporates, turning liquid water into water vapor (gas) that rises. When it meets the cold surface of the ice plate above, it condenses back into liquid water droplets—just like real clouds form when warm moist air rises and meets colder air at higher altitudes. Those droplets grow heavy and fall back down—rain. This jar contains a complete miniature water cycle—evaporation, condensation, and precipitation are all visible in under 5 minutes.
Experiment 5: Tornado in a Bottle — Vortex Physics
Concept Taught: Vortex formation, centripetal force, fluid dynamics
Age Range: 6–12
What You Need:
- Two 2-liter plastic bottles
- A tornado tube connector (available cheaply online) OR strong waterproof tape
- Water
- Glitter (optional)
- Blue food coloring (optional)
Steps:
- Fill one bottle about 3/4 full with water. Add coloring and glitter if desired.
- Connect the two bottles at their necks using the tornado tube or waterproof tape, making sure the seal is watertight.
- Turn the full bottle upside down on top of the empty one.
- Swirl the top bottle in a circular motion for 3–4 seconds.
- Watch a spinning water vortex form as the water spirals down into the lower bottle!
The Science: Swirling the bottle creates a vortex—a spinning column of water with a hollow center. The spinning motion creates centripetal force that pushes water outward toward the bottle walls, leaving the center open as an air channel. This channel allows air to flow up into the top bottle as water flows down—without the vortex, air and water compete for the same opening, and the flow is slow and irregular. This is the same physics that creates tornadoes, whirlpools, and bathtub drains.
Experiment 6: Floating Paperclip — Surface Tension Challenge
Concept Taught: Surface tension, density, experimental technique
Age Range: 6–12
What You Need:
- A bowl of still water
- Several metal paper clips
- A small piece of tissue paper
- Dish soap
Steps:
- Place a small square of tissue paper gently on the water surface.
- Carefully lay a paper clip on top of the tissue paper.
- Using a pencil tip, gently push the edges of the tissue paper down until it sinks, leaving the paper clip floating on the surface.
- The paper clip will float—even though metal is far denser than water!
- Add a drop of dish soap to the water near the paper clip and watch it immediately sink.
The Science: The paper clip floats not because it is less dense than water but because the surface tension of water acts like a thin elastic film that can support the paper clip’s weight when it is placed carefully. You can even see the water surface bend slightly downward under the paper clip’s weight. Adding soap immediately reduces surface tension — the film breaks and the paper clip sinks instantly. This is a powerful visual demonstration of how surface tension works and how soap destroys it.
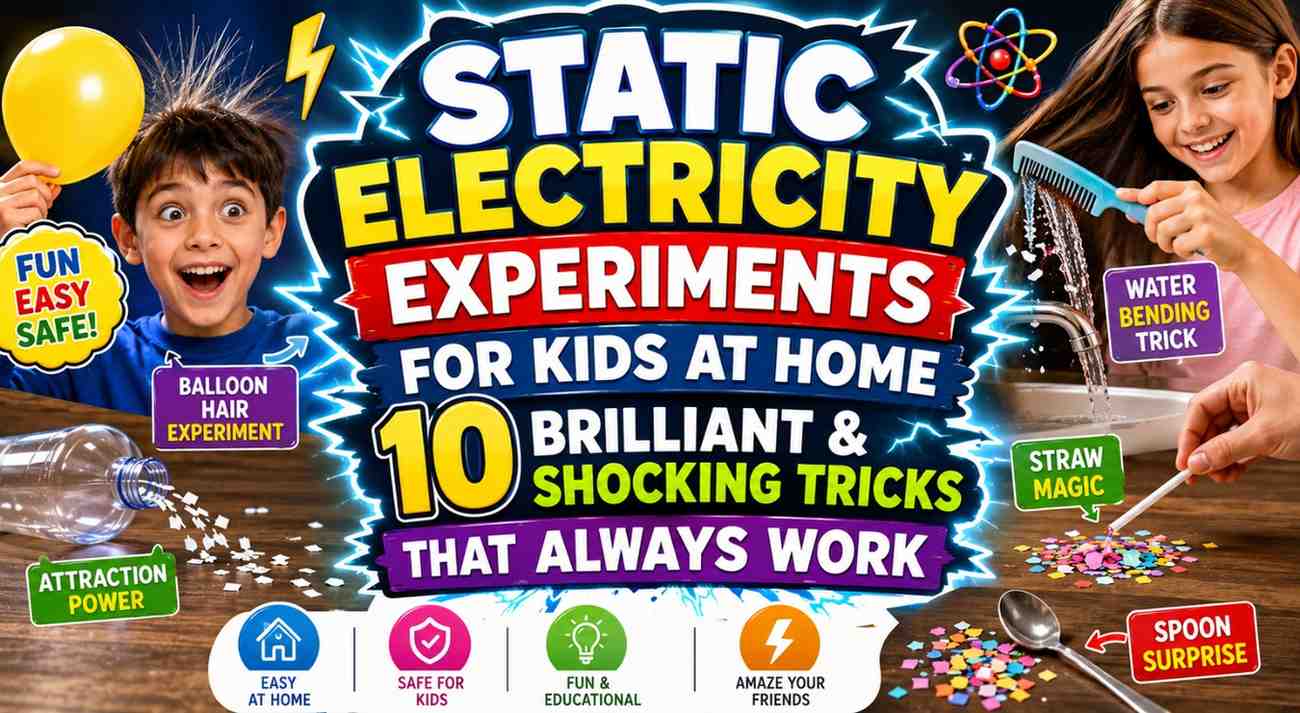
Experiment 7: Bending Water with Static Electricity
Concept Taught: Static electricity, molecular polarity, electrostatic attraction
Age Range: 6–12
What You Need:
- A tap with a thin stream of running water
- An inflated balloon
- A wool sweater or your hair
Steps:
- Turn on the tap to produce a very thin, steady stream of water.
- Rub the balloon vigorously on a wool sweater or on your hair for 15–20 seconds.
- Slowly bring the charged balloon close to the water stream—but do not touch it.
- Watch the stream of water bend noticeably toward the balloon!
- Move the balloon further away — the water straightens. Move closer — it bends again.
The Science: Rubbing the balloon transfers electrons from the wool to the balloon, giving it a negative static charge. Water molecules are polar — they have a slightly positive end and a slightly negative end. When the negatively charged balloon approaches, the slightly positive ends of water molecules rotate toward it (opposites attract), and the water stream is pulled toward the balloon. This is called electrostatic induction—and it works because water molecules are polar, unlike nonpolar liquids like oil, which would not bend at all.
Experiment 8: Ice Fishing — Freezing Point Depression
Concept Taught: Freezing point depression, phase changes, salt chemistry
Age Range: 6–12
What You Need:
- A bowl of water with ice cubes
- A piece of string or thread (about 20 cm)
- Table salt
Steps:
- Place an ice cube in the bowl of water and let it float stably.
- Lay one end of the string across the top of the ice cube.
- Sprinkle a pinch of salt directly onto the string and the ice cube beneath it.
- Wait 30–60 seconds without disturbing the setup.
- Gently lift the string — the ice cube lifts with it, attached to the string!
The Science: Salt lowers the freezing point of water—this is called freezing point depression. When salt is sprinkled on the ice, it causes a thin layer of ice directly beneath the string to melt. This creates a small pool of very cold, salty water around the string. As the salt disperses, the freezing point rises again, and the water refreezes—trapping the string inside a new layer of ice. This is the same principle used to grit roads in winter — salt prevents ice from forming at 0°C, requiring much colder temperatures to freeze.
Experiment 9: Cartesian Diver — Pressure and Buoyancy
Concept Taught: Boyle’s Law, water pressure, buoyancy
Age Range: 7–12
What You Need:
- A 2-liter plastic bottle filled completely with water
- A small plastic sauce packet from a fast-food restaurant (ketchup or soy sauce)
Steps:
- Fill the bottle completely to the very top with water.
- Test the sauce packet — drop it in water. It must just barely float. If it sinks immediately, find a different packet with a larger air bubble.
- Drop the floating packet into the completely full bottle.
- Screw the lid on tightly with no air gap.
- Squeeze the sides of the bottle firmly—the packet sinks! Release—it rises!
The Science: The sauce packet contains a tiny air bubble that makes it just barely buoyant. When you squeeze the bottle, you increase water pressure throughout the liquid—this compresses the small air bubble inside the packet (Boyle’s Law: pressure and volume are inversely related). The packet becomes slightly denser than water and sinks. Release the pressure—the bubble expands, the packet becomes buoyant again, and it rises. This is the exact principle used in submarine ballast systems to dive and surface.
Experiment 10: Soap-Powered Boat — Surface Tension Propulsion
Concept Taught: Surface tension, propulsion, chemistry
Age Range: 5–10
What You Need:
- A shallow tray or large baking dish filled with water
- A small piece of thin cardboard or thick paper
- Scissors
- A toothpick
- Dish soap
Steps:
- Cut the cardboard into a small boat shape—about 5 cm long with a notch cut into the back.
- Fill the tray with still, clean water and let it settle completely.
- Dip the toothpick tip into dish soap.
- Place the boat gently on the water surface.
- Touch the soapy toothpick to the water just inside the notch at the back of the boat.
- Watch the boat shoot forward across the water surface!
The Science: Surface tension pulls equally in all directions on the water surface, keeping the boat still. When soap is added at the back, it dramatically reduces surface tension at that point. The stronger surface tension pulling from the front and sides now pulls the boat forward—like a stretched elastic band releasing. Once the soap has spread across the entire tray surface, the effect ends — you need fresh water to repeat it. This is one of the most elegant and simple science experiments for kids using water.
Experiment 11: Hot and Cold Water Density Mixing
Concept Taught: Thermal density differences, convection
Age Range: 6–12
What You Need:
- Two identical glasses or jars
- Hot water (colored red with food dye)
- Cold water (colored blue with food dye)
- A thin piece of cardboard
Steps:
- Fill one glass with very hot red water to the very brim.
- Fill the second glass with very cold blue water to the very brim.
- Place the cardboard over the top of the cold blue water glass.
- Carefully and quickly flip the cold water glass upside down and place it on top of the hot water glass, aligning the openings.
- Slowly slide out the cardboard.
- Watch what happens—the hot red water rises and the cold blue water sinks!
The Science: Hot water is less dense than cold water because heat causes water molecules to move faster and spread further apart, reducing density. When the barrier is removed, the less dense hot water rises above the denser cold water—demonstrating convection and thermal density differences. If you reverse the setup (cold on bottom, hot on top), the layers mix immediately because the denser cold water sinks and the less dense hot water rises—there is no stable stratification.
Experiment 12: Water Filtration System
Concept Taught: Filtration, environmental science, water purification
Age Range: 8–12
What You Need:
- A 2-liter plastic bottle cut in half
- Gravel or small pebbles
- Coarse sand
- Fine sand
- Cotton balls or a coffee filter
- Muddy water (mix garden soil with water)
- A cup to collect filtered water
Steps:
- Turn the top half of the bottle upside down to create a funnel shape — place it in the bottom half as a collection vessel.
- Layer materials from bottom to top inside the funnel: cotton balls first at the very bottom (neck), then fine sand, then coarse sand, then gravel at the top.
- Pour muddy water slowly through the top of the gravel layer.
- Collect the filtered water in the cup below.
- Compare the clarity of your filtered water to the original muddy water.
The Science: Each layer removes different sizes of particles. Gravel catches large debris, coarse sand removes medium particles, fine sand filters finer particles, and cotton catches the smallest particles and residue. This is a working model of real municipal water treatment filtration — the same principle used to provide clean drinking water to millions of people worldwide. Note that homemade filters remove particles but do not remove dissolved chemicals or bacteria—real water treatment adds additional stages, including chemical treatment and UV sterilization.
Experiment 13: Invisible Water Cycle in a Bag
Concept Taught: Water cycle, evaporation, condensation, transpiration
Age Range: 5–9
What You Need:
- A zip-lock plastic bag (clear)
- Water
- Blue food coloring
- Permanent marker
- Tape
- A sunny window
Steps:
- Add about 3–4 tablespoons of water colored blue to the bag.
- Use the permanent marker to draw a sun, clouds, and rain on the outside of the bag—labeling the water cycle stages.
- Seal the bag tightly.
- Tape the bag to a sunny window in the morning.
- Check throughout the day—water will evaporate from the bottom, condense as droplets on the top and sides, and eventually drip back down.
The Science: The sun’s heat causes the water to evaporate—turn from liquid into invisible water vapor. The vapor rises to the cooler upper parts of the bag, where it condenses back into liquid droplets on the plastic surface. These droplets grow heavier and slide back down—precipitation. The bag contains a closed water system — the same water cycles continuously, just as it does in Earth’s atmosphere. This is one of the most visually clear and memorable science experiments for kids using water for teaching the water cycle.
Experiment 14: Archimedes’ Principle — Does It Float or Sink?
Concept Taught: Buoyancy, Archimedes’ principle, density
Age Range: 5–10
What You Need:
- A large clear tub or bowl of water
- A ball of modelling clay
- Various household objects
- A kitchen scale (optional)
- A notebook for predictions and results
Steps:
- Drop the ball of modeling clay into the water—it sinks.
- Remove it and reshape it into a flat bowl or boat shape.
- Place the bowl-shaped clay gently on the water surface—it floats.
- Gradually add small weights (coins) to the clay boat—how many can it hold before sinking?
- Record predictions and results for each object tested.
The Science: This is Archimedes’ principle in action—an object floats when it displaces a volume of water that weighs more than the object itself. The solid clay ball is denser than water and sinks. But reshaped into a bowl, the same clay now traps air and displaces a much larger volume of water—enough to support its own weight and more. This is exactly why a steel ship floats despite steel being far denser than water — its hollow shape displaces enormous volumes of water. Archimedes famously discovered this principle while stepping into a bath and reportedly ran through the streets shouting, “Eureka!”
Experiment 15: Magic Water Bridge — Cohesion at Work
Concept Taught: Cohesion, surface tension, water properties
Age Range: 8–12
What You Need:
- Two identical glasses
- Water
- A high-voltage static source (a charged balloon or comb)
- OR: Try this simpler version with two glasses, water, and a very steady hand
Simple Version Steps:
- Fill both glasses completely to the brim with water.
- Place them touching each other, side by side.
- Very slowly and carefully tilt one glass slightly so water just barely begins to flow between the two glasses over their touching rims.
- With extremely steady hands, pull the two glasses apart by just 1–2mm while the water is flowing between them.
- A thin bridge of water will momentarily connect the two glasses!
The Science: Water molecules exhibit extraordinary cohesion—they cling to each other with remarkable strength due to hydrogen bonding between water molecules. This hydrogen bonding is what gives water its high surface tension, its ability to climb through plant stems, and — in this remarkable demonstration — its ability to briefly bridge two separate glasses. The water bridge exists because the cohesive force between water molecules is strong enough, momentarily, to hold the column of water together. This experiment requires patience and a steady hand but produces one of the most genuinely astonishing demonstrations of water’s molecular properties.
Tips for Maximum Success With Water Science Experiments
Getting the best possible results from science experiments for kids using water comes down to a few key habits that real scientists practice every day.
Use clean equipment. Even tiny traces of soap, oil, or residue can dramatically affect experiments involving surface tension. Rinse glasses and trays thoroughly before experiments and dry them completely when preparing for surface tension demonstrations.
Control your variables. When comparing results — for example, testing how many drops fit on different coin types — keep everything the same except the one factor you are testing. This is the foundation of the scientific method.
Make predictions first. Before each experiment, ask your child what they think will happen and why. Write it down. Compare the prediction to the actual result. Being wrong is just as scientifically valuable as being right — it means something unexpected happened, which is where the most interesting science often begins.
Measure when possible. How many drops? How many centimeters did the water rise? How long did the vortex last? Adding measurement to observation transforms a fun activity into real quantitative science.
Connecting Water Science to the Real World
Every one of these science experiments for kids using water connects directly to real-world science, engineering, and technology.
Capillary action is how trees transport water from roots to leaves hundreds of feet in the air—without any pump. It is also how paper towels absorb spills and how blood moves through tiny capillaries in the body.
Surface tension is why insects like water striders can walk on water, why dew forms in spherical drops on leaves, and why bubbles are spherical.
Water density differences drive ocean currents that regulate Earth’s climate—warm water flows along the surface, and cold water sinks and flows along the ocean floor in a global conveyor belt that distributes heat around the planet.
Filtration principles underlie the water treatment systems that provide clean drinking water to billions of people worldwide—one of the most important public health achievements in human history.
For more verified, curriculum-aligned water science activities, the United States Geological Survey’s Water Science School provides outstanding free educational resources for children and teachers.
Frequently Asked Questions (FAQ)
Q1: What is the best science experiment for kids using water for a science fair project? The water filtration system and the density tower both make outstanding science fair projects. The filtration system tests different filter materials and measures water clarity—providing clear, measurable, real-world-relevant results. The density tower can be extended by testing whether temperature changes the order of layers.
Q2: Which water experiments work best for very young children aged 5–6? The walking water experiment, the soap-powered boat, the invisible water cycle bag, and the rain-in-a-jar experiment are all perfectly accessible for ages 5–6 with minimal adult assistance. They are fast, visually clear, and require no fine motor precision.
Q3: Can these experiments be done in a classroom? Every experiment in this guide is classroom-friendly. The penny drops, walking water, and water filtration experiments are particularly well-suited to classroom settings because they can be done simultaneously by multiple groups with minimal equipment and mess.
Q4: Why does my walking water experiment not work? The most common cause is using paper towels that are too thick or too loosely textured. Use standard kitchen paper towels folded into narrow strips. Also ensure the strip forms a continuous arch with both ends submerged—even a centimeter above the water surface breaks the capillary connection.
Q5: How do I make the tornado in a bottle spin longer? Add a few drops of dish soap to the water before starting—this slightly reduces internal friction and helps the vortex maintain its spin longer. Also ensure the bottle connection is completely airtight — any air leak disrupts the vortex formation.
Conclusion
Science experiments for kids using water reveal what is perhaps the most important lesson that hands-on science can teach: the most ordinary things in the world are, when examined with curiosity and care, among the most extraordinary.
Water is in every tap, every puddle, every glass on every table in every home. Children walk past it, wash their hands in it, and drink it dozens of times every day without a second thought. Yet inside that utterly familiar substance lives a world of molecular drama—of cohesive forces and surface tension, of density gradients and capillary highways, of pressure physics and exquisite thermal behavior.
These 15 science experiments for kids using water are designed to break that invisibility open. To make children stop, look, and ask, “Why does it do that?” How does that work? What would happen if I changed this? Those questions — simple, curious, unstoppable — are the starting point of every great scientific career and every important discovery ever made.
The water is already there. The curiosity is already there. All it takes is a penny, a paper towel, a balloon, a bottle, and the willingness to look at something ordinary as if seeing it for the very first time.
So fill the tray, steady your hand, and drop in the first drop. Science is waiting at the tap.
External Resource (DoFollow): For curriculum-aligned water science resources, interactive diagrams, and educator guides, visit the USGS Water Science School—a free, authoritative resource provided by the United States Geological Survey.